This is the third and final post in a series on using the Gmail API from FileMaker. Please review the previous articles, if you haven’t already, particularly the first one which covers setting your app up with Google and authentication. There’s also a great article by Brendan McBride from dbservices that covers importing emails from an inbox into FileMaker. This article can be seen as the first in the series as it leads directly to the ones we’ve done here.
Integrating FileMaker and Gmail Part 1 – Sending HTML Emails
Integrating FileMaker and Gmail Part 2 – Sending Attachments
dbservices – FileMaker Gmail Integration
As with the first article, all of these examples use the native Insert From URL script step so there won’t be any plug-ins required, and since the Insert From URL is supported in all aspects of the FileMaker platform, these techniques can be adapted to work on the Server, Go, FileMaker Cloud, and WebDirect. These techniques require FileMaker 16 or higher as they use the advanced cURL options introduced in that version.
Working With Threads
This article will be looking at working with email threads. It will cover querying for responses to a specific thread of emails and maintaining the thread correctly when responding to an email from FileMaker. Here’s a video overview along with a new free example file below:
FileMaker Gmail Integration: Example File
Please download the example file FM2Gmail v1.31 for a working demo. This new version adds the ability to receive incoming messages for existing threads and reply to them. This file replaces v1.2 from the previous article. File updated July 19th, 2019.
Managing Replies
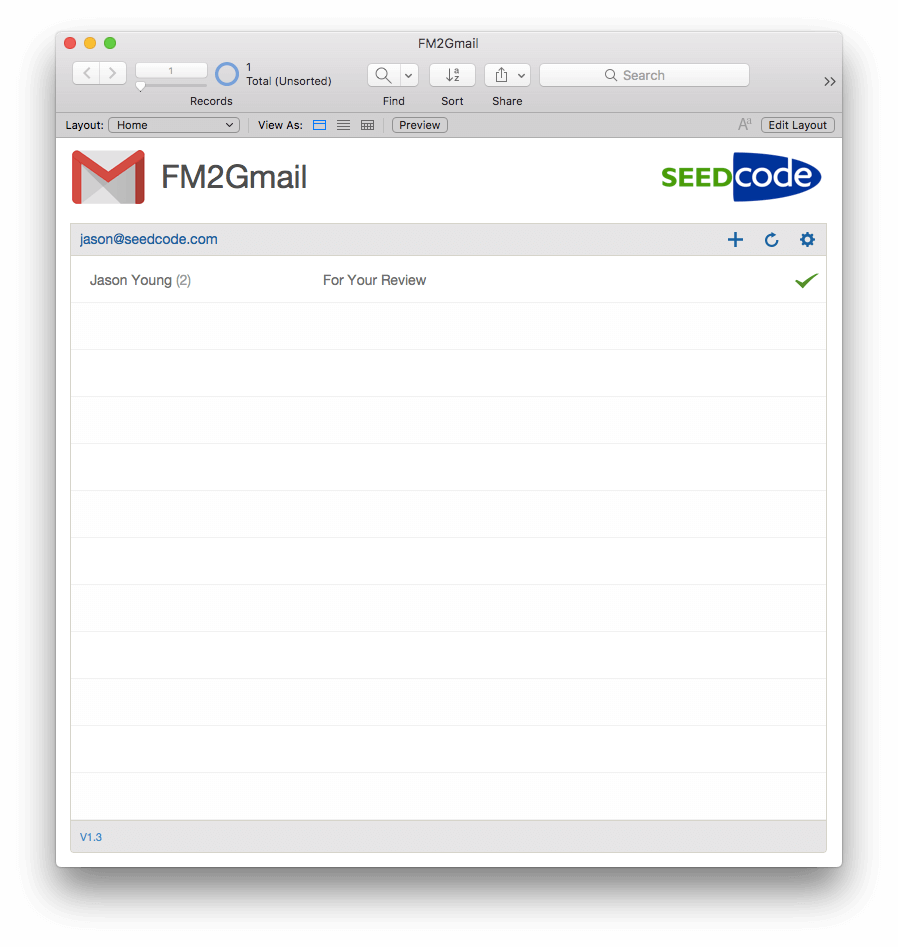
At the end of our last example, we had successfully sent an HTML email with multiple attachments, but what if the correspondent responds to the message? If we want our outgoing message to be associated with a specific FileMaker record, then it’s likely we’ll want all the responses to this email, and all subsequent responses, to be associated with this record as well. Let’s look at this in action. I’ve sent a message from our example file to myself, and now I’m going to respond and add a new inline attachment to my response.
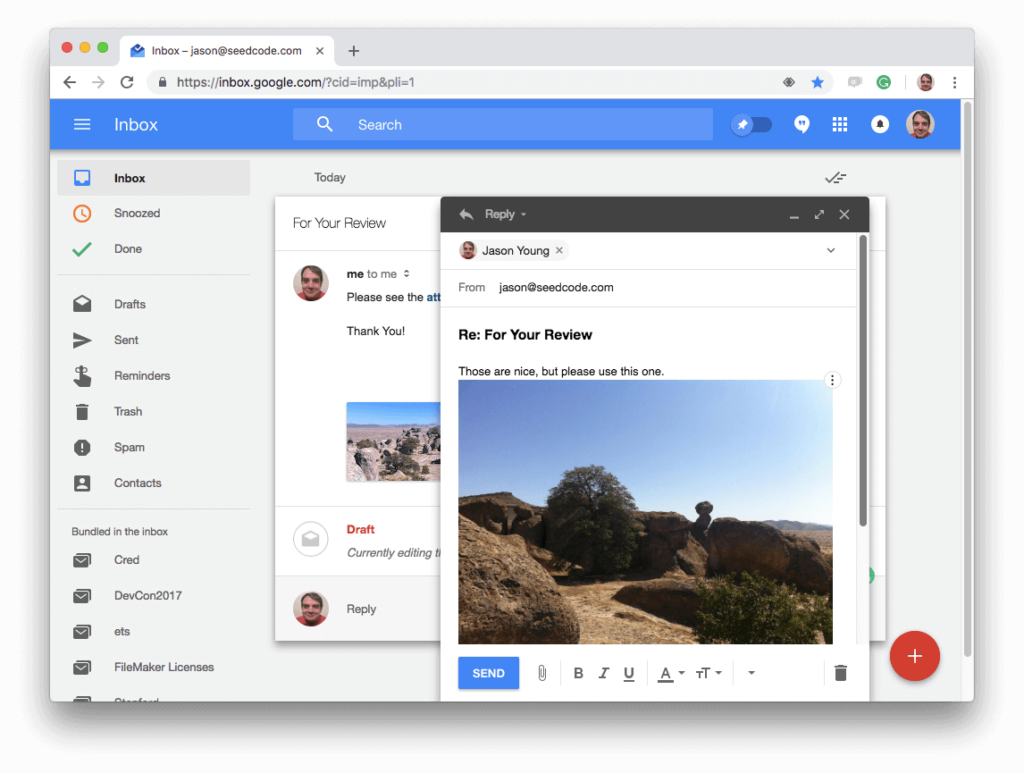
When you reply to an incoming email from Gmail or any email client, the thread id is maintained, and this keeps all responses in the same thread. If we want to check and see if we have any replies to our outgoing emails, then we can just query those specific threads by the thread id. Any new emails with the same thread id will be new responses to that threat. In our sample file, we can hit the little refresh button on the right and check for replies in just this way.

After running our refresh, we see our text go bold, and a (1) appended to the correspondent’s name indicating we’ve got one new message in the thread. When we click on that line, we are taken to the newest response in a found set representing the thread.

We also see that the attachment is correctly displaying inline and that we have a new reply button. If we click reply, we’re brought back to our compose screen: but now when we send, we’ll need to make sure we specify our thread id and include a few other headers to make sure the thread is maintained correctly.
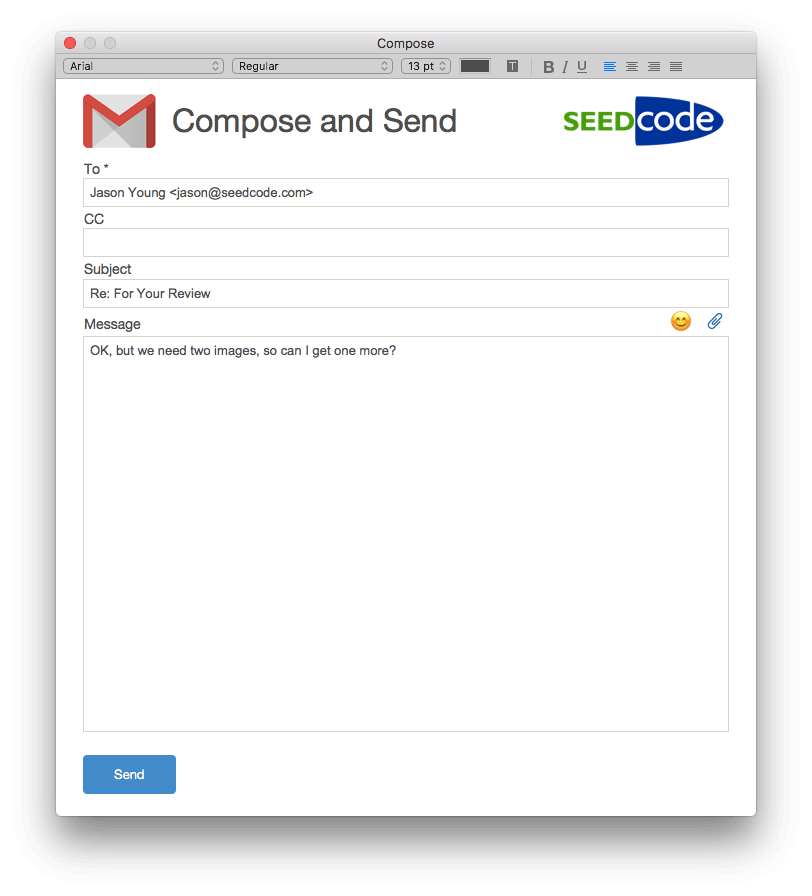
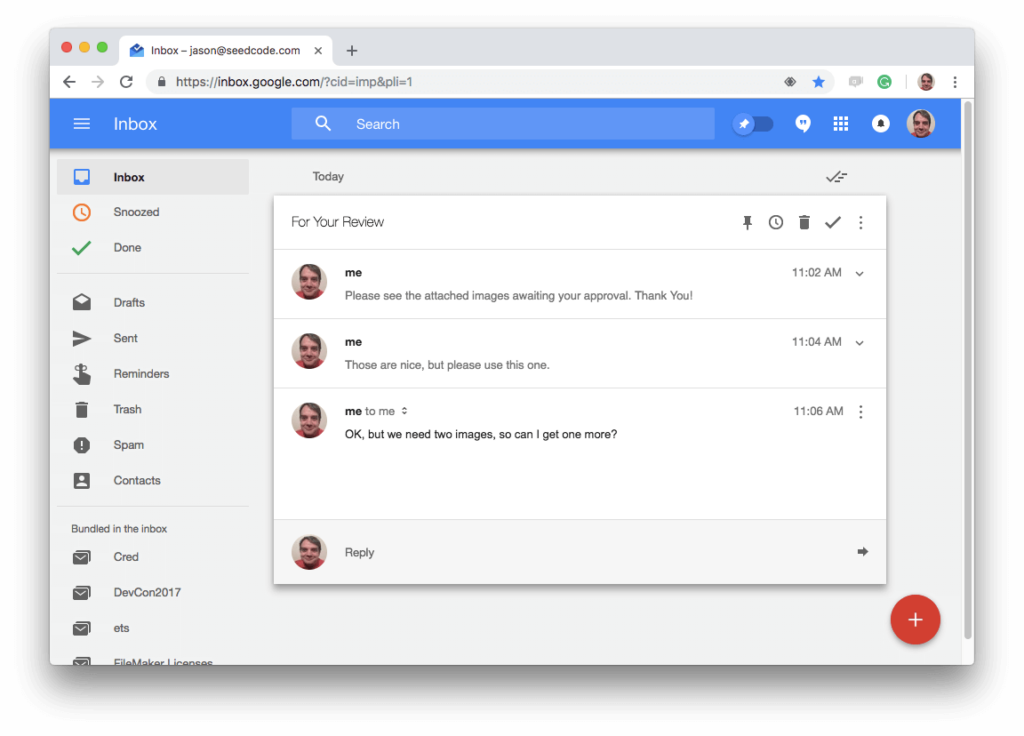
If we don’t specify the thread id or miss one of the required headers, then the email will still go out, but it will appear in the correspondent’s inbox as a new email, rather than a response to this thread. Fortunately, we’ve figured that tricky part out for this example file, and we now see our response from FileMaker maintains the thread for the correspondent.
Gmail Threads: Under The Hood
Checking A Thread
As we’ve seen in our previous examples, when an email is successfully sent, we get a simple JSON response like this.
{
 "id": "167180923a6f9ac3",
 "threadId": "167180923a6f9ac3",
 "labelIds": [
 "UNREAD",
 "SENT",
 "INBOX"
 ]
}
One of the properties is the thread id, and for the first email in the thread, the message id and the thread id are the same, as they are in the example above. When we send an email successfully from our example file, we write both values to the email record, so we can use the thread id for future queries.
In our example file, the top level script is Update New Messages which loops through all the thread ids for the related emails and goes through 3 potential steps.
The first step is to get a list of all the email messages associated with the thread. We can do a GET to the following URL to get a basic list of the messages. The URL for this is below. Make sure you specify the parameter format as minimal, or we’ll get all the headers and body content of the messages, and we’re not sure which ones are new yet. In all the code examples below, the double brackets represent a variable value to be inserted.
https://www.googleapis.com/gmail/v1/users/me/threads/[[$threadId]]/?format=minimal
The following cURL option needs to be specified for authentication:
-H "Authorization: Bearer [[$accessToken]]"
And I always include a variable to track the response headers as well:
-D "$responseHeaders"
A successful response is JSON that we can loop through and get a list of the message ids:
{
  "id": "167b308b2e619a0d",
  "historyId": "13543311",
  "messages": [
    {
      "id": "167b308b2e619a0d",
      "threadId": "167b308b2e619a0d",
      "labelIds": [
        "SENT"
      ],
      "snippet": "Please see the attached images awaiting your approval. Thank You!",
      "historyId": "13543233",
      "internalDate": "1544896950000",
      "sizeEstimate": 4223596
    },
    {
      "id": "167b30a4740e0b44",
      "threadId": "167b308b2e619a0d",
      "labelIds": [
        "IMPORTANT",
        "SENT"
      ],
      "snippet": "Those are nice, but please use this one. On Sat, Dec 15, 2018 at 11:02 AM <jason@seedcode.com> wrote: Please see the attached images awaiting your approval. Thank You! -- Jason Young SeedCode LLC",
      "historyId": "13543233",
      "internalDate": "1544897054000",
      "sizeEstimate": 1420834
    }
  ]
}
That list is then compared to a list of the message ids that we already have as records in the file: removing those ids we already have. If there are no ids left in the list, then the process ends. Otherwise, it continues on to step 2: getting the email content.
Importing an Email
This part of the process is very similar to what dbservices put together in their example. Brendan covered some of this already, but we’ll go over our process in the context of this example. You can step through the script Get Email to see these processes in more detail.
To get the content of an email, we do a GET to a URL that references the email by its message id.
https://www.googleapis.com/gmail/v1/users/me/messages/[[$id]]
And the cURL options needed are the same as the initial GET:
-H "Authorization: Bearer [[$accessToken]]"
-D "$responseHeaders
A successful response is a large, somewhat complex JSON response, but the paths that we’re looking for are payload.headers and payload.parts. Both are JSON arrays.
The headers array needs to be looped through to capture the required values as variables. In addition to the obvious ones, like To, From and Subject, we also need to grab the headers References, and In-Reply-To, as they will be needed for sending a reply to this message.
Once the headers are captured, the payload.parts array is examined for the email content. If the email has no attachments, then the first part is the plain text version of the body and the second part is the HTML version. The content lives in the path body.data of each part and is actually encoded as base 64, even though it’s just text. This is what’s known as web safe base 64, which means that any + characters in the base64 are replaced with a – character and any / characters are replaced with the _ character, so before we decode the base64 we need to reverse those substitutions like this:
Substitute ( [[$b64]] ; [ "-" ; "+" ] ; [ "_" ; "/" ] )
Email Attachments
If the email does have attachments, then the process moves on to the third step of downloading their content. You can step through the script Get Attachment to see these processes in more detail.
If the email has attachments, then the first part of the payload.parts array will be another array containing the plain text and the HTML. Each subsequent part will represent an attachment. The part will include the headers like the filename and the x-id, which we capture, and the body of the part will be an id representing the attachment content; that will need to come down in another GET request. After looping through all the parts in the array, there will be a list of file names, x-ids and ids for the attachments themselves. The x-ids are captured in case we need to deal with inline attachments. Finally, we loop through the list of attachment ids, and a GET is performed for each one for the content.
The URL for the attachment content is:
https://www.googleapis.com/gmail/v1/users/me/messages/[[$messageId]]/attachments/[[$attachmentId]]
And we specify the same cURL options as before:
-H "Authorization: Bearer [[$accessToken]]"
-D "$responseHeaders"
A successful response will be a simple, but large JSON response that looks like this:
{
  "data" : [[b64]],
  "size" : 1000000
}
This is also web safe base64, so make sure to do the character substitutions mentioned above before decoding it.
Inline Email Attachments
If an inline attachment is received, then the syntax in the HTML will look like this:
This will break when displayed in the web viewer, even though the attachment was retrieved, as it can’t be referenced this way. What we can do to display the image inline is to substitute the “cid:167b3905c94ee53b3ac1″ reference for an inline base64 reference of the image. The cid reference is the x-id that was captured earlier, so a substitute like this can be performed to create the inline base64:
Substitute ( Email::MessageHTML ; "cid:" & $attachmentXIds; "data:image/png;base64, " & $b64 )
Replying From FileMaker
Now that we are successfully getting responses to the emails we sent from FileMaker, we want to make sure any additional responses we send are also treated as replies in the same thread. Fortunately, the resumable upload sending method we set up in our last example file doesn’t need to be modified very much to support replies. The main change is in the Request Resumable Upload URL script where the parameter for the thread id can now be specified.
If the thread id is not specified then the request is formatted exactly as it was in the last example where we don’t include a body with the POST, and we include the following header:
-H "Content-Length: 0"
If a thread id is specified, then we need to include a simple JSON body with the request specifying the thread id like this. When you include the body the Content-Length header is no longer required.
-d "{ "threadId" : [[$threadId]] }"
That’s the only change needed in that request. If the thread id is passed, then the resumable upload URL that’s returned “knows” that the forthcoming message belongs to that thread and it doesn’t need to be specified again in the initial and subsequent PUTS to send the message.
The only other change that needs to be made for a reply is that the email headers In-Reply-To and References need to be specified as part of the RFC2822 email form. Those headers are included in the script Create RFC2822 Form and pull the values from the fields of the same name in the Email table. Those values were captured when the message was imported into our example file, so they just need to be copied from the incoming message to its reply. This happens in the simple script Reply.
As mentioned before, both these headers must be specified in the form and the thread id needs to be included in the JSON request for the resumable upload request, or the email won’t be properly threaded. It will send without an error but will come in as a new email to the recipient and not a reply. It seems like a simple change, but I admit it took me a while to figure this out and get it working correctly.
Conclusions
Although maybe not as flashy as working with HTML and attachments, managing threads is a rich tool to incorporate into your applications. Associating specific threads with specific records in your database keeps your display targeted to just what’s relevant. By replying correctly from your app, we can ensure these threads aren’t broken and can provide an excellent experience for your FileMaker users and their correspondents.


10 Comments
Hi Seedcode,
My colleague, Frank, left a message earlier regarding an issue receiving emails. I have tested further and found that emails sent from Apple Mail (OS X 10.14.6) are received as empty emails i.e. no text or attachments are shown. This includes sending from an IMAP GMail account in Apple Mail. However, when we send from the GMail web interface everything works as expected?
Perhaps the API has changed a little since 2018, or an Apple Mail update since then is causing the issue?
Best,
Clem
Hi there:
I’m trying to download part 3 of fm2gmail v1.3 but the current link points to version 1.2. It would be possible to have version 1.3.
Thanks in advance for your interesting article
Hi Jesus,
I double-checked and I’m getting v1.31 which has the Reply button and maintains the thread. The link is:
https://www.seedcode.com/?smd_process_download=1&download_id=11892
Let me know if that doesn’t resolve it.
-Jason
Now it works, thx a lot
Hello,
Great project, really!
One issue found, when I reply from my Mac with Apple-Mail (all updated to latest OSX 10.14.3). The attachments are missing (one small .PNG and a small .LOG file), and are replaced by the ‘smime.p7s’ file (digital signature).
I found out that the ‘partID’ is starting from 0 (empty filename), then 0.0 (empty filename), 0.1 (empty filename), 0.1.0 (empty filename), 0.1.1 (gmail.png filename), 0.1.2 (empty filename), 0.1.3 (import.log filename), 0.1.4 (empty filename) and then 1 for the smime.p7s file.
Is there something I can do to fix this index, skip empty files and some specific file like the .P7S?
Thank you very much.
I have the same issue from Apple Mail, although I am not using a digital signature. All attachments sent from Apple Mail are not shown, along with any text in the same email i.e. only empty emails are displayed.
Hello,
The redirect URI you provide can’t be use.. https://seedcode.com/fm2gmail/fm2gmail.html
When setting up Authorized redirect URIs in google console, it says domain must be added to the authorized domains list before submitting.
Setting up my own I get stuck during connexion (card window show email but not password for connexion)
Hi,
You can add seedcode.com as an authorized domain on the Credentials/OAuth Consent tab, about halfway down. However, if you have a different domain you want to use, any page will work there.
When the redirect happens FileMaker is running an On Timer script looking for a hash value being appended to the end of the redirect URI and captures it in a variable, using the GetLayoutObjectAttribute() function. All the functionality is in that On Timer script and the base redirect URI doesn’t matter, but it does need to match exactly what was specified with Google, so I think that may be what you are running into.
If you’re still stuck, send me a message a support@seedcode.com.
Let me know if that helps,
-Jason
How much does it cost to get access to the Google Gmail API? How do we sign up?
Hi Kyle,
Using the Gmail API is free and the terms and conditions are here:
https://developers.google.com/gmail/api/terms
You can set up a developer account and a Project here:
https://console.developers.google.com/
When you create your credentials, you’ll want to specify a Web Application so you can specify the redirect URI and get your client id and client secret.
The dbservices post and our first post in the series cover this set-up in a little more detail. The links to those posts are at the top of this article.
HTH,
-Jason