Based on a customer’s request we’ve put together a neat example to show you how to convert the filters in ProMaps from drop-down lists to checkboxes so you can select multiple items at once. This is a simple change you can make in your own copy of ProMaps–be sure to ask us for this example file if you’d like to make this change in your copy.
Here’s quick demo of the changes in action:
[youtube id=”JeQRmVDl3K4″]
Making the changes in your file.
1. Scripts
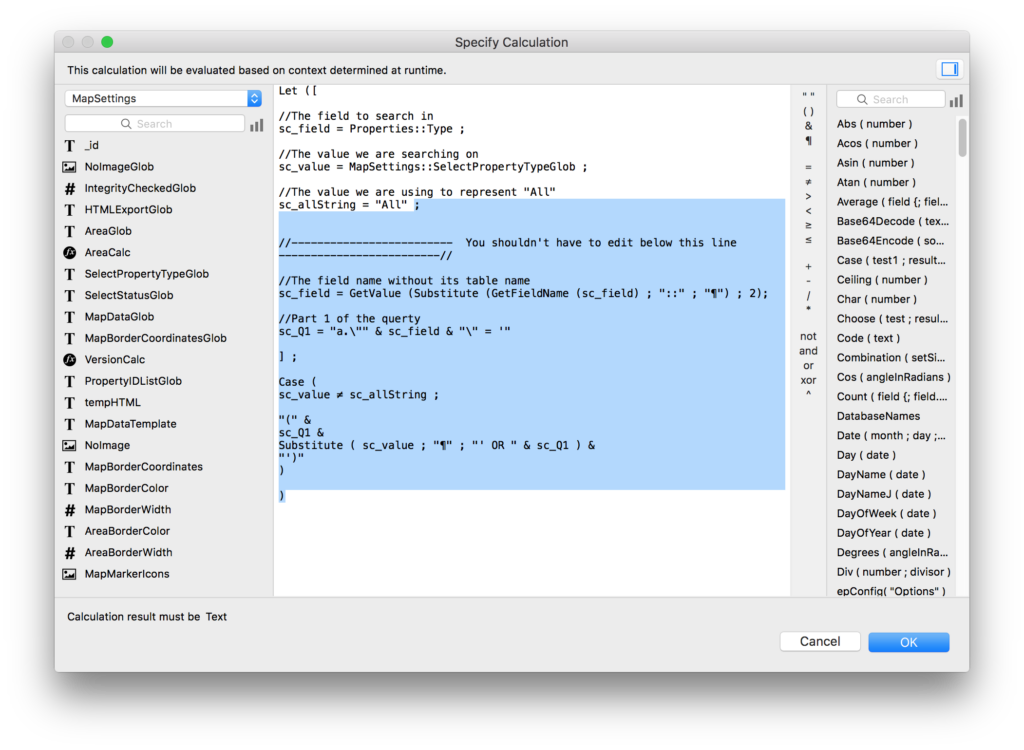
Edit the script “Filters And Headers” and you’ll see a set variable line for each of your filters. If you don’t remember modifying these set variable lines when you first added the map to your file, documentation on how these work can be found here. Open the first set variable line and change the highlighted lines from this:
To this:
(Remember, you don’t have to type this in from these screenshots; ask us for a copy of this example file instead.)
These highlighted lines are the same for every variable so make this change in each variable you’ve set up.
2. Fields
We also made a little change to the global filter fields themselves so that filtering for “all” items is a little easier now that the checkbox fields will support multiple selection. Add the following auto-enter option to each of your global filter fields starting with MapSettings::SelectStatusGlob
If ( RightValues ( Self ; 1 ) = "All¶" ; "All" ; Substitute ( Self ; "All¶" ; "" ) )
Note that you want the checkbox “Do not replace existing value of field (if any)” to be unchecked. This auto-enter calc will be the same for any filter field you’d like to switch to checkboxes, so add this to all of them now.
3. Layouts
The third change is just to switch the actual filter fields to checkboxes. We found this worked better if we moved the filters to the left side of the map but you certainly don’t have to. Just remember that if you put them in popovers (tempting) the popovers will only cover the web viewer on Macs; that doesn’t work on Windows yet.
We hope you find this useful!


